Typography support between browsers has a history of being spotty. One of the major hurdles in creating the (yet-to-be-released) next-incarnation of Sketchpad was typographic support; between browsers and even within the <canvas> specs. One pitfall of the <canvas> tag is the lack of text-metrics support (past calculating the width via ctx.measureText). This prevents us from emulating how text works in DOM for other elements such as <div> or even <textarea>—fortunately, these metrics can be measured through simple css-hacks.The solutions to the following are provided:
- ctx.textBaseline=”alphabetic”; // alphabetic, top, bottom, middle
- ctx. textAlign=”left”; // left, right, middle, start, end
- measureText(‘hello’).width // px width of typeface
The solution for finding these metrics is compatible with browsers as far back as 2004 (such as Firefox 1.0), before <canvas> was introduced. Out of 64 browsers tested on BrowserShots and the 30 tested on CrossBrowserShots, four browsers failed to generate proper metrics for Arial with these CSS solutions. There was an error margin of +/- 2px, which may accounted for in the differences between anti-aliasing in <canvas> vs. rendering in <div>/<span>/<ect>.
Table of contents
Bounding boxes
Calculating the bounding-box of unicode
I’ve used a simple brute-force formula to calculate the bounding-box of unicode characters for the following text experiments called “getTextMetrics”. Once you know the text metrics, you can do most anything ?
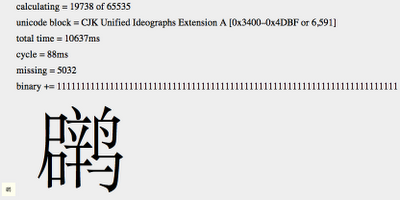
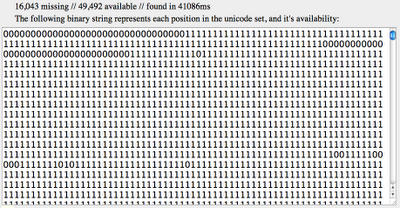
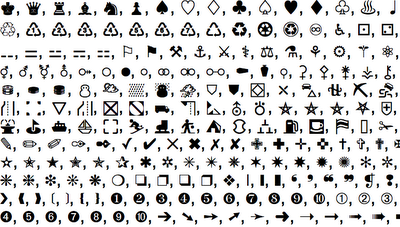
It’s been very useful to me for many purposes: Unicode Profiling Project, Font-Family Profiling Project, calculating the “Ascent, Descent, and x-height”, and finding the bounding-box of unicode glyphs to create stamps, amongst other things.
See getBitmapBounds demo in action.
(function() {
var fontFamily = "Arial, san-serif";
var fontSize = 14;
getFontMetrics = function(props) {
	var ctx = props.ctx;
	var text = props.text;
	var bboxHeight = props.bboxHeight;
	var canvasHeight = props.canvasHeight;
	var baseline = props.baseline || "alphabetic";
	var flip = props.flip || false;
	var drawBaseline = props.drawBaseline || false;
	if (props.fontFamily) fontFamily = props.fontFamily;
	if (props.fontSize) fontSize = props.fontSize;
	// setting up the canvas
	ctx.save(); // create canvas to use as buffer
	ctx.font = fontSize + "px " + fontFamily;
	var textWidth = ctx.measureText(text).width;
	// This keeps font in-screen, measureText().width doesn't
	// quite do it in some cases. For instance "j", or the letter "f"
	// in the font "Zapfino".
	var offsetx = fontSize * 2;
	var offsety = fontSize * 2;
	var cwidth = ctx.canvas.width = Math.round(textWidth + offsetx * 2);
	var cheight = ctx.canvas.height = canvasHeight ? canvasHeight : Math.round(offsety * 2);
	if (typeof(baseline) == "string") {
		offsety = 0; // using <canvas> baseline
 ctx.textBaseline = baseline;
 }
 // ctx.font has to be called twice because resetting the size resets the state
 if (flip) ctx.scale(1, -1);
 ctx.font = fontSize + "px " + fontFamily
 ctx.fillText(text, offsetx, (typeof(bboxHeight)=="number" ? bboxHeight : offsety));
 // drawing baseline
 if (drawBaseline) {
 ctx.fillRect(0, canvasHeight/2, ctx.canvas.width, 1);
 }
 // grabbing image data
 var imageData = ctx.getImageData(0, 0, cwidth, cheight);
 var data = imageData.data;
 // calculating top
 var top = 0;
 var pos = 0;
 while (pos < data.length) { if (data[pos + 3]) { pos -= pos % (cwidth * 4); // back to beginning of the line top = (pos / 4) / cwidth; // calculate pixel position top -= offsety - fontSize; pos = data.length; // exit loop } pos += 4; } // calculating bottom var bottom = 0; var pos = data.length; while (pos > 0) {
 if (data[pos + 3]) {
 pos -= pos % (cwidth * 4); // back to beginning of the line
 bottom = (pos / 4) / cwidth;
 bottom -= offsety - fontSize;
 pos = 0; // exit loop
 }
 pos -= 4;
 }
 // calculating left
 var left = 0;
 var col = 0, row = 0; // left bounds
 while (row < cheight && col < cwidth) {
 var px = data[(row * cwidth * 4) + (col * 4) + 3];
 if (px) {
 left = col - offsetx;
 row = cheight;
 col = cwidth;
 }
 row ++;
 if (row % cheight == 0) {
 row = 0;
 col++;
 }
 }
 // calculating right
 var right = 0;
 var col = cwidth, row = 0; // right bounds
 while (row < cheight && col > 0) {
 if (data[(row * cwidth * 4) + (col * 4) + 3]) {
 right = col - offsetx;
 row = cheight;
 col = cwidth;
 }
 row ++;
 if (row % cheight == 0) {
 row = 0;
 col --;
 }
 }
 // calculating real-bottom
 var realBottom = 0;
 var pos = data.length;
 while (pos > 0) {
 if (data[pos + 3]) {
 pos -= pos % (cwidth * 4); // back to beginning of the line
 realBottom = (pos / 4) / cwidth;
 pos = 0; // exit loop
 }
 pos -= 4;
 }
 // restoring state
 ctx.restore();
 // returning raw-metrics
 return {
 "left": (-left),
 "top": (fontSize - top),
 "width": (right - left),
 "height": (bottom - top),
 "bottom": realBottom
 }
};
})();
ctx.textBaseline
Mimicking the way text is supported in other DOM elements
By default <canvas> text is aligned to the “alphabetic” baseline. When drawing to a canvas, using the default baseline, and a y-position of 0, only the descenders can be seen:
ctx.fillText(“Hello world!”, 0, 0);
To mimic how text is viewed in <div>/<span>/<input> other html elements we can use the “top” baseline. This works wonderfully, however, not all browsers support the “top” baseline. If baseline=”top” works in your browser “Hello world!” should become visible in the following example:
ctx.textBaseline = “top”;
ctx.fillText(“Hello world!”, 0, 0);
Opera, Safari and Chrome work identically with “top”, “bottom”, “middle”, and “alphabetic”… however, Firefox seems to remove the “buffer-spacing” (the invisible spacing that goes above the ascenders, and below the descenders on each line of text) which prevents it from mimicking how Firefox draws other DOM elements. Older browsers wont support baseline=”top” or other baseline variants at all.
This illustrates our problem… lets find a solution!
<canvas> -> “Ascent”, “Descent” and “x-height”
According the Apache FOP, the “top” baseline is equal to the “ascent”, the “bottom” basline is equal to the “descent”, and the “middle” baseline is half of the “x-height”. Given this information, it’s possible to measure these values in <canvas> when ctx.getImageData() and ctx.textBaseline are supported.
To measure these baselines, the following code was used:
See <canvas> baseline demo in action.
// finding portion that protrudes past bottom of alphabetic baseline
var Descent = getFontMetrics({
	ctx: ctx,
	text: "YourText",
	bboxHeight: 0,
	canvasHeight: bboxHeight * 3,
	baseline: "alphabetic",
	fontFamily: fontFamily + ", " + defaultFont,
	fontSize: fontSize
}).bottom;
// calculating top-baseline
var TopBaseline = getFontMetrics({
	ctx: ctx,
	text: "YourText",
	bboxHeight: 0,
	canvasHeight: bboxHeight * 3,
	baseline: "top"
}).bottom - Descent;
// calculating bottom-baseline
var BottomBaseline = getFontMetrics({
	ctx: ctx,
	text: "YourText",
	bboxHeight: bboxHeight,
	canvasHeight: bboxHeight * 3,
	baseline: "bottom"
}).bottom - bboxHeight - Descent;
// calculating middle-baseline
var MiddleBaseline = getFontMetrics({
	ctx: ctx,
	text: "YourText",
	bboxHeight: bboxHeight,
	canvasHeight: bboxHeight * 3,
	baseline: "middle"
}).bottom - bboxHeight - Descent;
Unfortunately, the only reliable baseline identically supported between all browsers in <canvas> is “alphabetic”, and there is no way to measure the “ascent” and “descent” when the only working baseline is “alphabetic”. The reason is the invisible “buffer-spacing” above and below the descenders changes the expected output, and there is no way to measure “invisible” space.
To recap: at this point, we still don’t have the ability to measure the “ascent”, “descent” and “x-height” when textBaseline isn’t supporting “top” or “bottom”… but, we do now know what values we’re searching for. Next, let’s look into getting the values from CSS.
CSS -> “Ascent”, “Descent” and “x-height”
After searching for a solution for hours in <canvas> under the crazy pursuit of measuring something invisible, I came home and found a simple solution in CSS. By using an <img> (or any inline-block element) and the vertical-align property inside of a container element (such as a <div>), the values <canvas> provides for ctx.textBaseline can be matched with an error margin of +/- 2px—many fonts are matched exactly. Likely, these discrepancies are due to anti-aliasing in <canvas> vs. DOM.
- The “top” baseline is equal to the image.offsetTop since an <img> element is automatically aligned to the baseline of a font.
- The “bottom” baseline can be found by subtracting the height of the text (see the measureText section) from the “top” baseline.
- The “middle” baseline can be found using “line-height: 0” on the container element and measuring the image.offsetTop—this works, because “line-height: 0” aligns the image to the center of the text, as the text now has a height of 0. In order to get the proper values the whole experiment must be offset vertically (so the text isn’t hidden off-screen).
See CSS text-metrics demo in action.
See text baseline demo in action.
// setting up html used for measuring text-metrics
var container = document.getElementById("container");
var parent = document.createElement("div");
var image = document.createElement("img");
image.width = 42;
image.height = 1;
image.src = "./media/1x1.png";
parent.appendChild(document.createTextNode("TheQuickBrownFox!"));
parent.appendChild(image);
container.appendChild(parent);
// getting css equivalent of ctx.measureText()
image.style.display = "none";
parent.style.display = "inline";
var measureHeight = parent.offsetHeight;
var measureWidth = parent.offsetWidth;
// making sure super-wide text stays in-bounds
image.style.display = "inline";
var forceWidth = measureWidth + image.offsetWidth;
// capturing the "top" and "bottom" baseline
parent.style.cssText = "margin: 50px 0; display: block; width: " + forceWidth + "px";
var TopCSS = image.offsetTop - 49;
var HeightCSS = parent.offsetHeight;
var BottomCSS = TopCSS - HeightCSS;
// capturing the "middle" baseline
parent.style.cssText = "line-height: 0; display: block; width: " + forceWidth + "px";
var MiddleCSS = image.offsetTop + 1;
Compensating for “overhanging” and “clipping”
Some font-faces protrude past the outside of their em-box, clipping their x or y axis. This protrusion, in typography, is called an overhang (or overshoot). Fortunately, this is something that can be compensated for.
To fix the clipping on the top portion of the text:
- Measure the entire height of the font in <canvas> using a lot of padding to make sure the entire text-string is visible.
- Resize the <canvas> to the height of the em-box, and align the baseline of your text to “top”. Measure the entire height again.
- Subject the first value from the second, this difference is the amount the text protrudes past the top of the em-box.
- Using this value, the top portion of the font-face that was clipped can become visible. This can be applied to <div>’s using padding-top, or to <canvas>’s by adjusting the y-offset of a text drawing command such as ctx.fillText() and adding the same value to the height of the <canvas> (assuming we want a perfect bounding-box).
Here’s an example of finding the clipping on left and top:
// compensating for text-clipping using padding-left
var leftClipping = getFontMetrics({
	ctx: ctx,
	text: "YourText"
}).left;
if (leftClipping < 0) { // is padding, not clipping
	leftClipping = 0;
}
// compensating for text-clipping using padding-top
var topClipping = getFontMetrics({
	ctx: ctx,
	text: "YourText",
	bboxHeight: 25,
	canvasHeight: bboxHeight,
	baseline: "top"
}).top + 25;
if (topClipping < 0) { // is padding, not clipping
	topClipping = 0;
}
Native support between browsers
On a side-note, it looks like at this time no browser supports the HTML5 standards “ideographic” or “hanging”. Opera/Safari/Chrome default to “top” and “bottom” respectively, whereas Firefox defaults to “alphabetic” in when these options are chosen. It looks impossible to fix “ideographic” and “hanging” without these values being provided via an external means (i.e. Python)—please prove me wrong ?
ctx.textAlign
Fixing older browsers
The only align that works in all browsers, old and new, is ctx.textAlign=”left”. We can fix “right” and “center” in older browsers by calculating the text-width. This can be done simply by creating a <span> with the same font-properties, and measuring the span.offsetWidth (DOM level 0).
Align to “start” and “end” require the additional knowledge of the directionality of the font to distinguish RTL from LTR languages. This poses a problem if the website doesn’t specify this information in the
See textAlign demo in action.
<span id="control">Hello world!</span>
function getAlign(text, type, offsetx) {
	var direction = window.getComputedStyle(document.body)["direction"];
	control.textContent = text;
	switch(type) {
		case "left": break;
		case "start": offsetx -= (direction == 'ltr') ? 0 : control.offsetWidth; break;
		case "end": offsetx -= (direction == 'ltr') ? control.offsetWidth : 0; break;
		case "right": offsetx -= control.offsetWidth; break;
		case "center": offsetx -= control.offsetWidth / 2; break;
	}
	return offsetx;
};
Native support between browsers
Opera, Safari, Chrome and Firefox work identically with “left”, “start”, “end”, “right” and “center” in their latest branches. Older browsers such as Firefox 2.x, and Opera 9.x require a fallback in order for ctx.textAlign to work properly, such as this CSS solution.
ctx.measureText
Fixing older browsers
We can fix old browsers with broken ctx.measureText support in CSS by calculating the span.offsetWidth using the same methods we used to fix ctx.textAlign:
See measureText demo in action.
<span id="control">Hello world!</span>
function measureText(text) {
	control.style.display = "inline";
	control.textContent = text;
	return {
		height: control.offsetHeight,
		width: control.offsetWidth
	};
};
Measurements provided this CSS solution produces identical results as ctx.measureText in Safari, Chrome and Opera. Firefox results are identical most of the time, with the occasional erroneous result within +/- 1px. Zapfino is an example of a font-face that produces this deviance.
Native support between browsers
Opera, Safari, Chrome and Firefox work nearly identically across systems within a difference of +/- 1px. Older browsers such as Firefox 2.x, and Opera 9.x require a fallback in order for ctx.measureText() to work at all.
Line-breaks in <canvas>
Finding the “em-height”
The em-height of a font can be found in Opera, Safari, Chrome and Firefox through measuring CSS-positioning in a similar method to the ctx.textAlign and ctx.measureText() demos.
Create a <span> element with the text you want to measure, with the font-properties set how you want them, and run span.offsetHeight—this measures the em-height. The em-height is the value we’re going to use to offset our line-breaks.
Calculating line & letter breaks
Calculating word-wrapping entails looping through the text.split(“ “) into singular words, and measuring each word individually until the edge of the bounding-box is hit, at which point a break is inserted, and the process continues. This works great for words that don’t extend past the bounding-box on their own.
When the word is so large it extends past the bounding box, we need to add in “letter-wrapping”. This is similar to hyphenation, but without the hyphen ? Calculating letter-wrapping entails looping through the text.length of the long word in question, until the edge of the bounding-box is hit, at which point a line-break is added.
See lineBreaks demo in action.
function getLines(text, maxWidth) {
	var returns = text.split("n");
	var lines = [];
	var lastPhrase = "";
	function splitWord() {
		var width = measureText(lastPhrase).width;
		var posA = 0;
		var posZ = 0;
		if (width > maxWidth) {
			for (var n = 0, length = lastPhrase.length; n < length; n ++) { 				var width = measureText(lastPhrase.substr(posA, posZ ++)).width; 				if (width > maxWidth) {
					lines.push(lastPhrase.substr(posA, posZ - 2));
					posA = n - 1;
					posZ = 2;
				}
			}
			return lastPhrase.substr(posA, posZ + 2);
		}
	};
	for (var n = 0; n < returns.length; n++) {
		if (lastPhrase) lines.push(lastPhrase);
		var phrase = returns[n];
		var spaces = phrase.split(" ");
		var lastPhrase = "";
		for (var i = 0; i < spaces.length; i++) {
			var measure = measureText(lastPhrase + " " + spaces[i]).width;
			if (measure < maxWidth) { 				lastPhrase += ((lastPhrase ? " " : "") + spaces[i]); 			} else { 				if (measure > maxWidth) {
					var split = splitWord();
					if (split) {
						lastPhrase = split + " " + spaces[i];
					} else {
						lines.push(lastPhrase);
						lastPhrase = spaces[i];
					}
				}
			}
			if (i == spaces.length - 1) {
				lines.push(lastPhrase);
				lastPhrase = "";
				break;
			}
		}
	}
	return lines;
};
Conclusion
Using the above methods, we can get text working when ctx.measureText, ctx.textAlign or ctx.textBaseline is malfunctioning. In a future installment we’ll look into embedded fonts, including adding support of ctx.fillText and ctx.strokeText by parsing SVG fonts and drawing them using the vector primitives ctx.moveTo, ctx.lineTo, ctx.quadradicCurveTo and ctx.bezierCurveTo.
View CSS text-metrics in <canvas>.
View CSS text-measurements.
HACKED BY SudoX — HACK A NICE DAY.

